How To Repair Computer Monitor Display Problems Caused By A Defective Screen Grid Voltage (G2) Capacitor
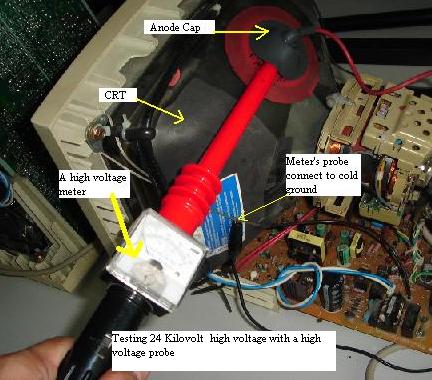
Computer Monitor display problems such as no display with high voltage symptom can be caused by many reasons. A defective picture tube, a faulty video preamplifier IC, a missing heater voltage, torn signal cable, negative G1 voltage became too high (-120 volt and above), CRT board problems, a missing or low G2 voltage and etc could cause no display but with the present of high voltage.
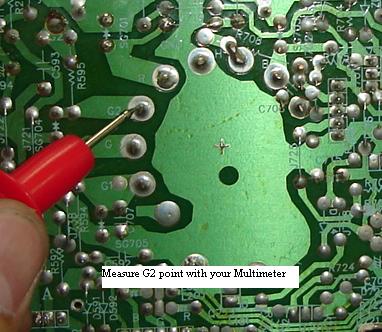
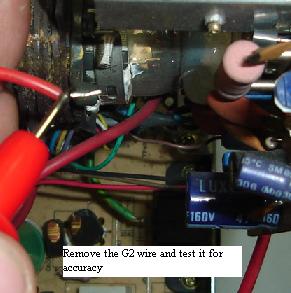 In this article I’m going to show you how to tackle a missing or low G2 voltage problem. First, you must confirm if there is high voltage present at the monitor. You can use a high voltage probe to measure the anode voltage (24 KV) or you can try to listen to the high voltage sound produced (if you are experienced enough) once the monitor is switch on If the high voltage is present then your focus should be in the screen grid voltage (G2) circuit. If there is no high voltage, then I will explain it in another article.
How to confirm if G2 voltage present at the pin of the CRT board? By placing your positive probe (red probe) to the G2 point and negative probe to cold ground with power on, your meter should registered some reading.
For your information, certain types of computer monitors, if you place your multimeter to the G2 point it would caused the monitor to shut down due to the caused of impedance loading of your meter. Assuming you measured a low G2 voltage say 20 volts dc (a good G2 voltage is somewhere between 250 – 300 + DC volt), the next step you should do is to isolate the problem to see whether is the G2 circuit that dragged down the voltage or the flyback transformer focus/screen voltage divider that had gone bad.
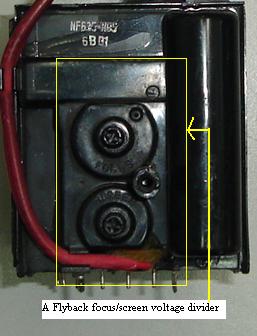
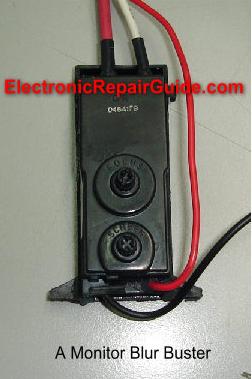 Switch off the monitor and desolder the G2 wire from the CRT board. Place your probe accordingly (red probe to G2 wire and black probe to cold ground) Now, switch on the monitor and begin to see the meter readout. If the reading you get is still about 20 volts or higher a little bit then suspect a defective flyback. You can also try to adjust the screen voltage control of the flyback.
If it already turned to maximum then the flyback need to be replaced. You can also use a cheaper way to solve it. Use a monitor blur buster to add in and defeat the original focus/screen cable and use the cable from the monitor blur buster to act as focus and G2. Thus, with this method the newly tapped G2 voltage could be solder it back to its original location and you will get a display when the monitor is switched on!
Now, what if the readout from your meter shown 250 to 300+ volts dc when the G2 wire voltage checked out of circuit? This is a very clear indication that there could be components that pulling down the G2 voltage to 20 vdc. From experienced, the resin coated type high voltage ceramic disc capacitor (usually in the 1-3 KV range) had caused quite a number of monitors became no display due to the capacitor pulling down the G2 voltage.
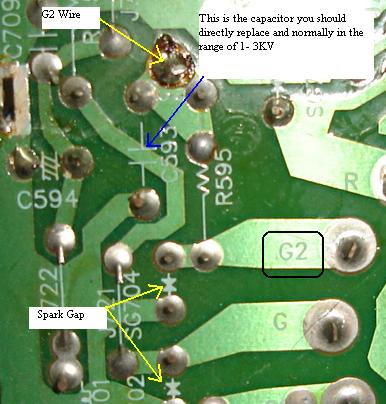
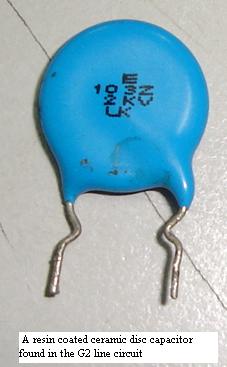
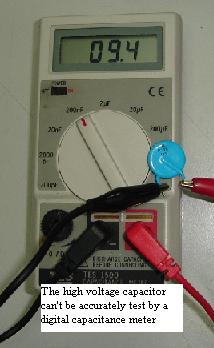 If you measure the high voltage capacitor with a digital capacitance meter or tester, chances are very high it reads okay (within the capacitance range). The truth is, you cannot rely on digital capacitance meter to test the capacitance value only, in fact this high voltage capacitor have a high tendency to breakdown when under full load or operating voltage.
The capacitor can only be accurately test by a special meter like the Sencore LC103 capacitor analyzer.
The cost of this meter is very high, so what I did I bought a Kyoritsu insulation tester for checking the high voltage capacitor purposes. Just clip on the capacitor leads under test and press start, a good capacitor will show some charge and discharge reading but the spoilt one will remained high and would not discharge.
Replacing only the bad high voltage capacitor made the G2 voltage rise back to normal and solve the computer monitor display problem. Hope you enjoy this article and please feel free to drop by website to learn electronic repair tips and secrets everyday.
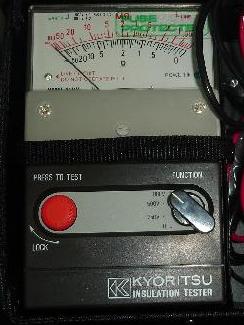
A Kyoritsu Insulation Tester
source: Electronicrepairguide.com
Nice article...practical and helpful with good pics. Heaviside, Brisbane , Australia.
ReplyDeletea great and clear information thanks for this idea it help us specially those end user about monitor reparing like me... a big thanks sir,
ReplyDeleterichard, philippines